The Setup Developer Module builds you a complete baseline setup from a blank sheet. Use it when you’re new to a car, new to a track, or just want a setup that makes sense before you start fine-tuning. It works subject by subject — ride height, then springs, then anti-roll bars, and so on — so you’re never staring at twelve setup screens trying to guess where to start.
New to onRails entirely? Start with the Getting Started guide first — it covers the Launcher, sim connection, and settings that apply here too.
If you already have a setup and want live feedback while driving instead of a baseline build, you want the Setup Engineer guide.
Settings
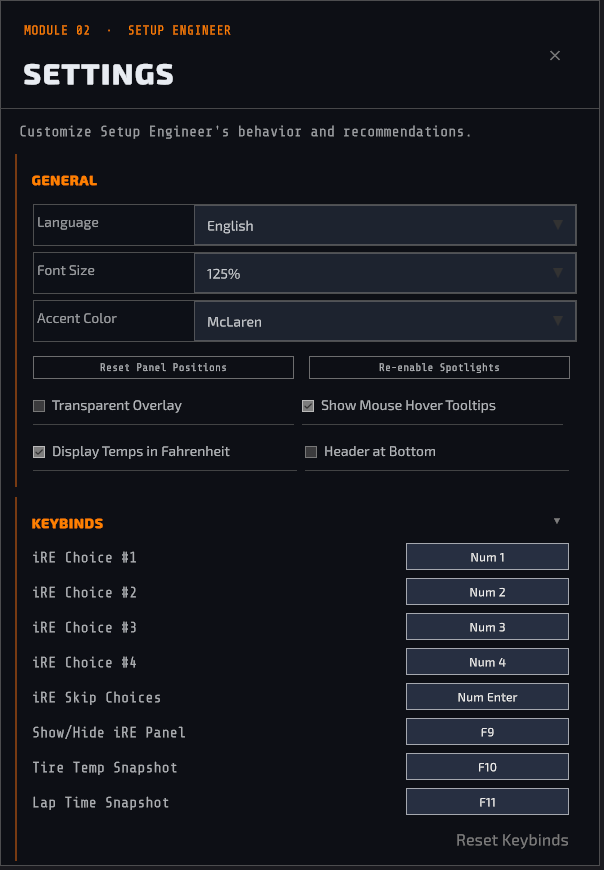
General
- Reset Panel Positions — snaps every draggable panel back to its default spot, useful if you’ve dragged something off-screen.
- Re-enable Spotlights — brings back the one-time spotlight tips if you dismissed them and want a refresher.
- Solid Background Window — same overlay/solid-window toggle covered in the Getting Started guide, available here too.
- Show Mouse Hover Tooltips — toggles the little tooltips that appear when you hover UI elements.
- Display Temps in Fahrenheit — switches tire temp display from Celsius.
- Header at Bottom — moves the app header to the bottom of the screen instead of the top.
- Card-Style Recommendations — the same one-at-a-time card vs. scrollable list toggle mentioned throughout this guide.
Keybinds — every hotkey used in Setup Engineer (In-Race Engineer choices 1–4, skip, toggle, tire temp snapshot, lap time snapshot) is rebindable here. Click a keybind button and press your new key, or use Reset Keybinds to put everything back to default.
Starting a session – selections
Launch Setup Developer from the Launcher.
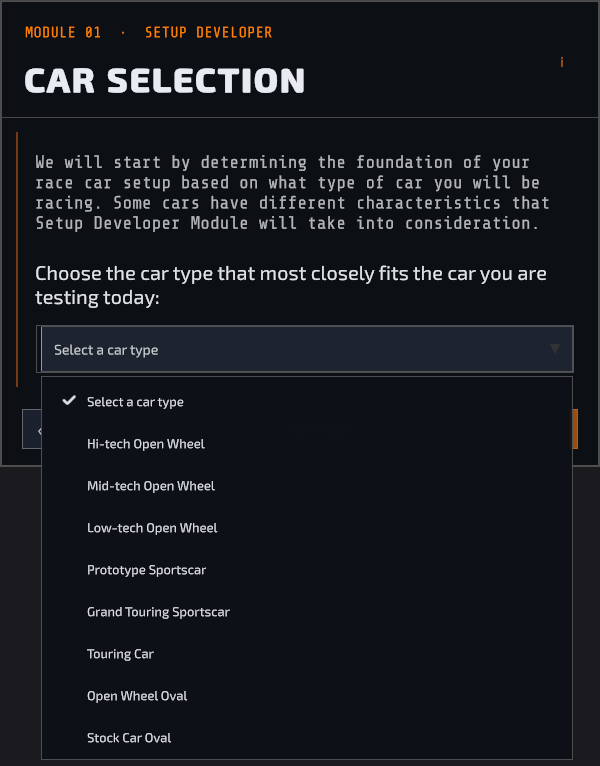
Pick whichever of these is the closest match to what you’re driving:
- Hi-tech Open Wheel — top-tier open-wheel (e.g. F1-style).
- Mid-tech Open Wheel — mid-tier open-wheel (e.g. F2/F3/Indy-style).
- Low-tech Open Wheel — entry-level open-wheel/formula cars, little to no aero.
- Prototype Sportscar — closed-cockpit endurance prototypes (LMP-style).
- Grand Touring Sportscar — GT-style sportscars.
- Touring Car — production-based touring cars.
- Open Wheel Oval — open-wheel cars built for oval racing.
- Stock Car Oval — stock cars built for oval racing.
This changes which setup subjects apply — a Low-tech Open Wheel car with no aero skips the aero questions, for instance.
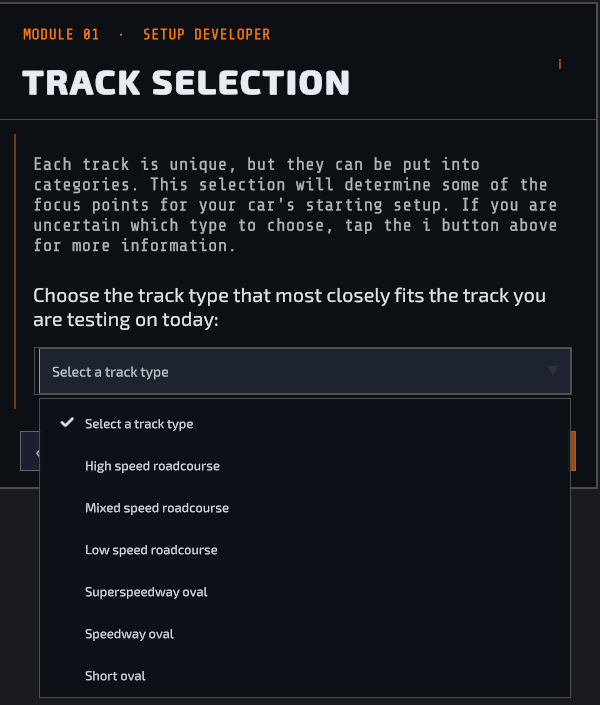
Pick whichever is closest to the track you’re actually running. This nudges the baseline setup in the right direction — a low-speed road course leans on more front aero and softer springs than a superspeedway, for example.
- High speed roadcourse
- Mixed speed roadcourse
- Low speed roadcourse
- Superspeedway (oval)
- Speedway (oval)
- Short oval
Pick a mismatched car/track combo (an Open Wheel Oval car on a road course, say) and SD warns you but doesn’t block you — most of these combos are rare but not impossible.
Track variables
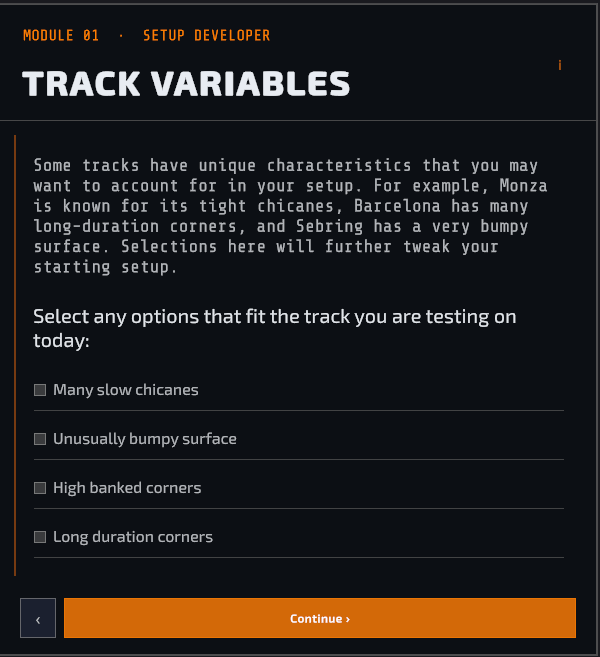
- Chicanes — quick left-right-left sections.
- Bumpy — rough or uneven track surface.
- Banked — corners with meaningful banking.
- Long Corners — sustained, high-load corners rather than quick transitions.
These are variables, not requirements — leave any of them off if you’re unsure or if they don’t apply. Toggling one on nudges specific values (springs, dampers, ARBs, etc.) in the direction that variable usually calls for; it’s a refinement on top of your track type pick, not a separate decision to agonize over.
The Starting Setup screen
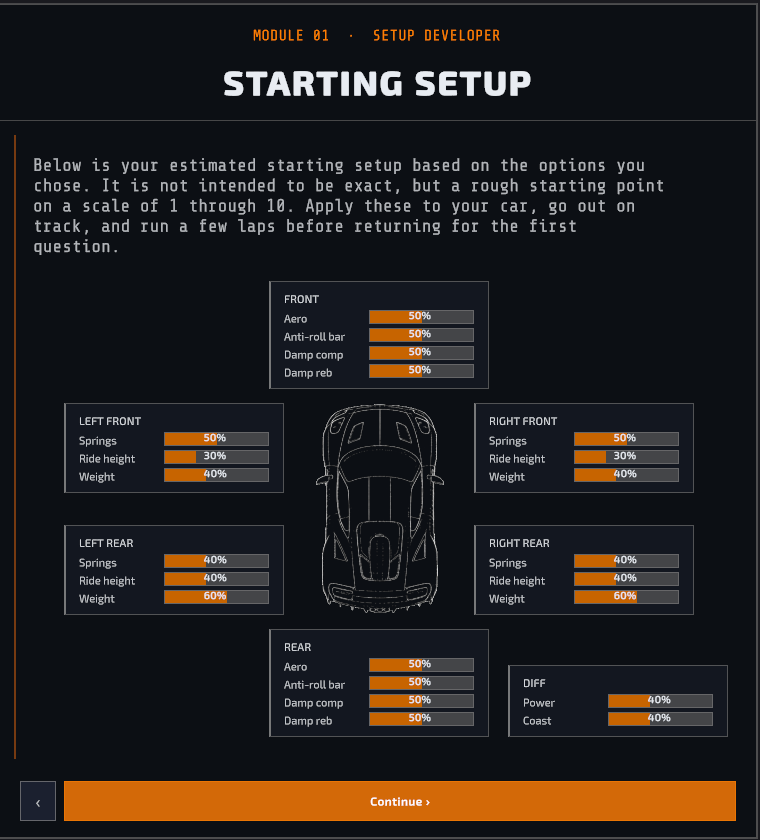
- Front — Aero, Anti-Roll Bar, Damper Compression, Damper Rebound
- Rear — Aero, Anti-Roll Bar, Damper Compression, Damper Rebound
- Diff — Power, Coast
- Left Front / Right Front / Left Rear / Right Rear — Springs, Ride Height, Corner Weight
Each bar shows roughly where that value sits on a soft-to-stiff (or low-to-high) scale for your car and track combo. This is your reference point, not a set of numbers to dial in exactly — everything after this is you adjusting away from this rough starting point, not guessing from zero. Treat the bar positions as “lean this direction,” not as a spec sheet.
If your actual car doesn’t have adjustment for one of these — no rear aero, no differential adjustment, fixed corner weights, whatever the case — just skip that bar and move on. It’s there because the car type as a whole supports it in general; nothing forces you to apply every value if your specific car can’t take the adjustment.
Working through the subjects
onRails’ Setup Developer walks you through 12 groups of subjects in this order:
Ride Height → Springs → Anti-Roll Bars → Weight → Cross Weight/Wedge → Trackbar → Tires & Camber → Toe → Gearing → Differential → Dampers → Aerodynamics
(Groups that don’t apply to your car/track combo — trackbar and wedge on a road course, for instance — are skipped automatically.)
Each subject works the same way:
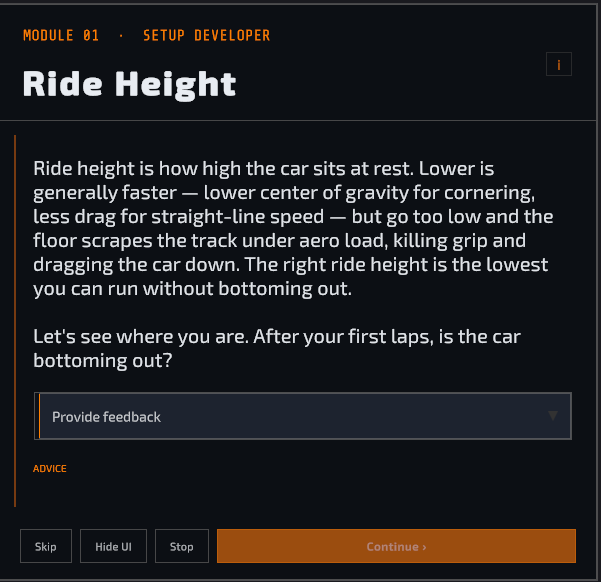
- Read the question.
- Answer using the dropdown provided.
- onRails gives you a plain-language setup change recommendation for that subject.
- Return to the sim to apply and try that recommendation.
- Repeat as many times as needed until you’re happy with that subject, then move to the next one.
A breadcrumb strip across the top tracks your progress through all 12 groups, so you always know how far you are from done.
Every question panel has an i (info) button at the top-right of each panel. Click it if the question itself isn’t enough context — it opens a plain-language explanation of what that subject actually affects on the car and why it matters, without leaving the question.
Once you’ve got a recommendation and want to go try it on track, click Hide UI on the question panel. This tucks the whole panel out of the way so you can drive a clean lap without it in your line of sight — SD doesn’t lose your place, it just gets out of the way.
When you’re ready to come back, a button reading I’M READY TO BUILD MY SETUP appears in the header. Click it and onRails restores you to the exact question you were on, breadcrumbs and all.
The lap logger
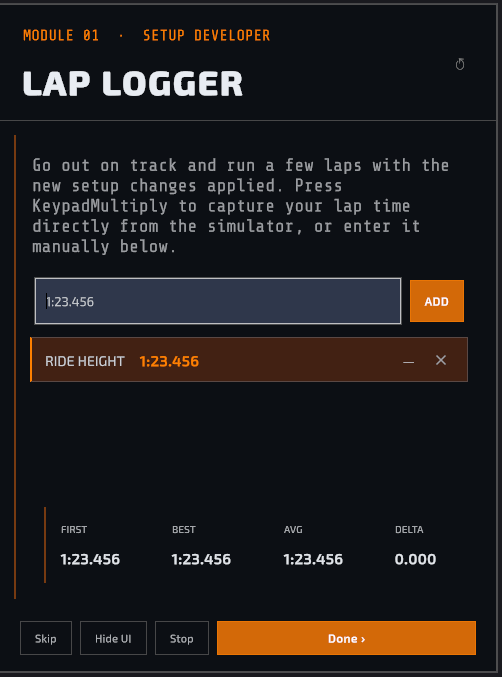
The lap logger is entirely optional, and can be turned off in Settings if you’d rather not deal with it. That said, it’s highly recommended: onRails uses it to track your lap times as your setup progresses subject by subject, and gives you a full summary at the end showing every subject you worked through and how your times moved as a result. Skipping it means skipping that record — the setup advice itself works exactly the same either way.
Tires & Camber
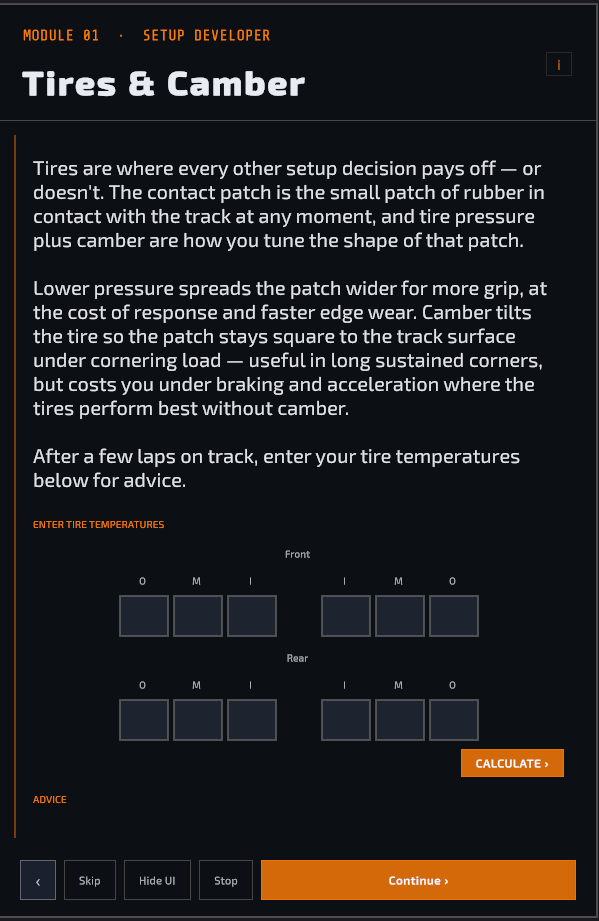
onRails reads the inner/middle/outer spread on each tire and tells you three things: whether you’re running toward understeer or oversteer, whether your camber is right, and whether your tire pressures are matched to the load each tire is seeing. This is the same math the Setup Engineer uses, just tuned a little more forgiving — the Setup Developer Module is meant to catch big baseline problems, not chase small session-to-session noise.
Entering tire temps isn’t required — you can skip past these questions if you want — but it’s heavily recommended. Tires are too important to leave unchecked, and this is where onRails really shines: a couple of temp readings tell you more about what your car is actually doing than almost any other single input you can give it.
Finishing up
Once you’ve been through all applicable subjects, Setup Developer gives you a complete setup summary. Restart at any point to go back to car/track selection, or use Hide UI to temporarily collapse the panel and take the car for a clean lap without the overlay in your view.
- Don’t rush. Each subject should take at least one multi-lap track session. Likely more to really dial in the car to your liking. onRails has a save feature, so you do not need to finish the entire 12-step sequence in one sitting.
- Don’t skip subjects just because you don’t have an opinion yet — the recommendation itself is the education.
- Log a lap before and after any change worth testing. A recommendation you can’t verify with lap time isn’t doing its job.
- If a subject doesn’t apply to your car, you can skip that question without issues.
- Don’t rush. Each subject deserves at least one multi-lap track session — likely more if you want to really dial the car in to your liking. onRails has a save feature, so you don’t need to finish the full 12-step sequence in one sitting.
Discover more from Virtual Race Car Engineer
Subscribe to get the latest posts sent to your email.