Indianapolis Track summary
 Indianapolis Motor Speedway is one of the most unique tracks in motorsport, not only because of its history, but because of its shape. It is commonly referred to as an oval, but in reality it is much closer to a rectangle, consisting of four straights and four 90-degree corners. At first glance, this might suggest a simple setup challenge, as all four corners appear identical. In practice, nothing could be further from the truth.
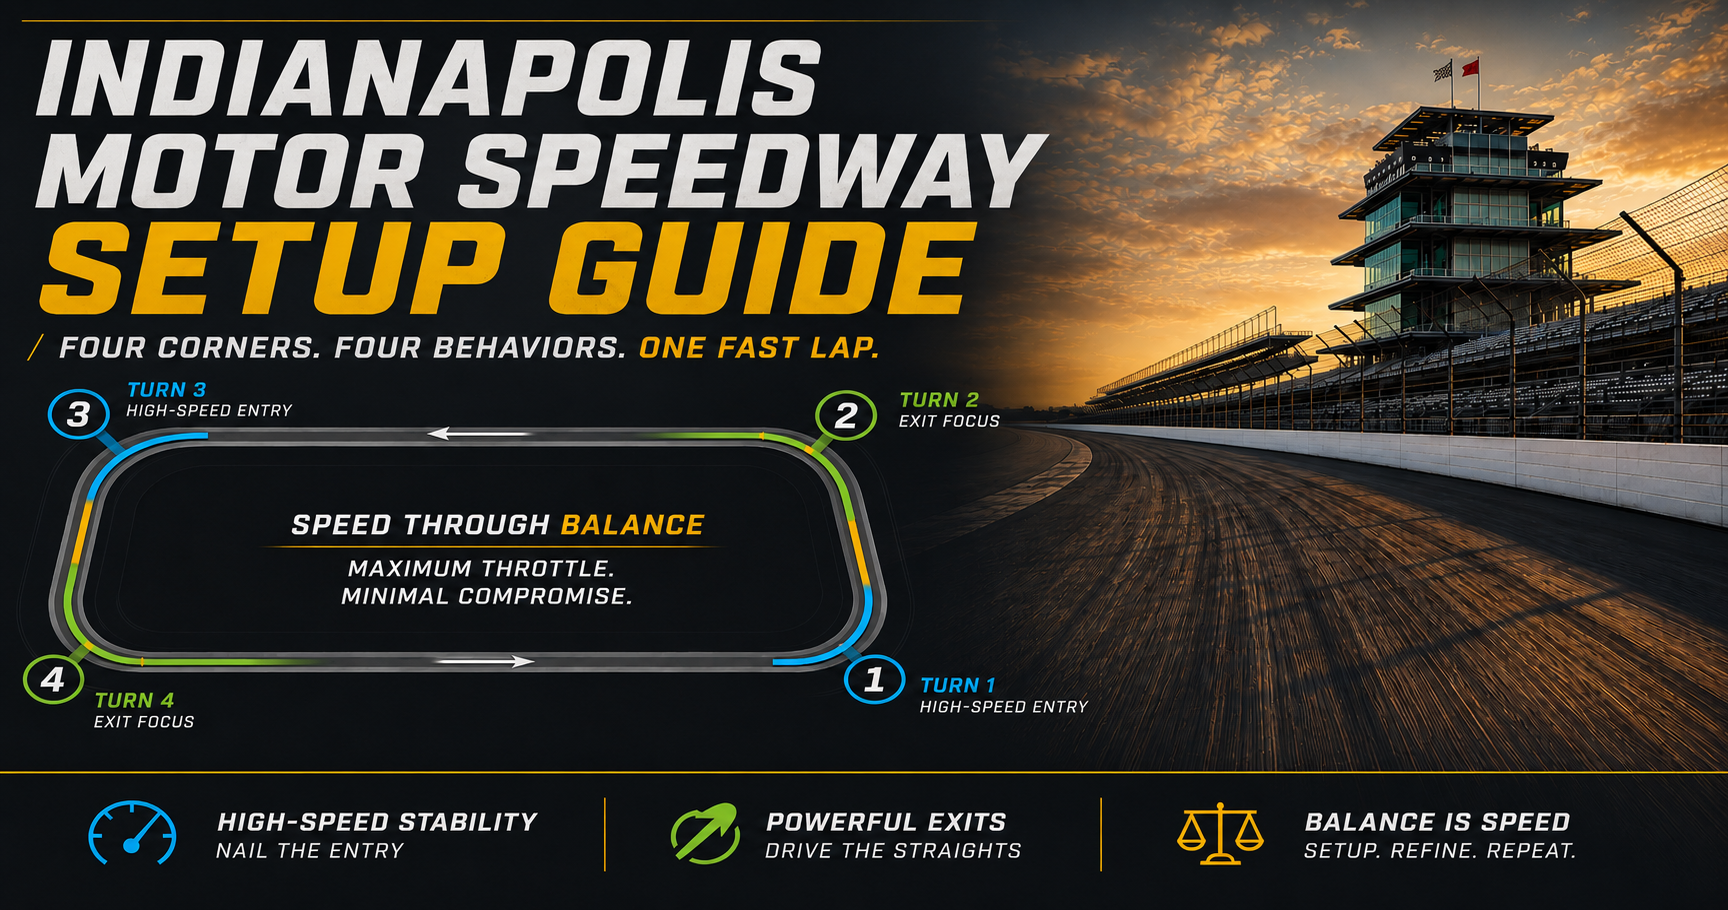
Each corner behaves differently because of the straights leading into and out of it. Turns 1 and 3 are approached at very high speed from long straights, while Turns 2 and 4 are entered after the car has already scrubbed off significant speed. Even though the geometry of the corners is identical, the way the car interacts with each one is not. Think of Indianapolis not as an oval, but as a road course with four left-hand corners, each demanding slightly different behavior from the car.
Starting your setup
Because every corner turns in the same direction, the setup can be biased heavily toward left-hand performance. This begins with weight distribution. Shifting weight toward the left side of the car increases the contribution of the inside tires during cornering and delays the point at which the outside tires become overloaded. At the same time, moving weight rearward reduces the load on the front tires, allowing them to maintain grip more effectively through the corners.
This creates a baseline that is heavily biased toward the left-rear of the car. Suspension settings should reflect this as well. Firmer spring rates on the left side and lower ride heights on that side help support the car under sustained lateral load. Alignment should also be adjusted accordingly, with positive camber on the left-side tires and negative camber on the right to ensure that each tire achieves an effective contact patch under cornering conditions. The result is a car that is purpose-built for sustained left-hand cornering before any fine-tuning begins.
Priorities – Speed Through Balance
At Indianapolis, speed is the priority, but not in the way it might first appear. Straight-line speed alone is easy to achieve by reducing aerodynamic drag, but this approach is only effective if the car can maintain sufficient grip through the corners. The true objective is to build a car that can navigate the corners with minimal loss of speed, allowing for maximum throttle application over the longest possible distance.
For high-speed cars such as IndyCar, the ideal scenario is to remain at full throttle through the corners. For other vehicles, the goal is to return to full throttle as early as possible. In both cases, corner performance determines overall speed.
This leads to a key principle: aerodynamic drag should be reduced only to the point where the car can still maintain the required cornering performance. A car with strong mechanical grip can operate with lower downforce, resulting in higher straight-line speeds. The entire setup process revolves around achieving this balance.
A firm suspension platform is often beneficial in this environment. Stiffer springs allow for lower ride heights, which improves aerodynamic efficiency by increasing underbody suction. This produces downforce without the drag penalty associated with wings, while also lowering the center of gravity and reducing body roll. The result is a car that is both stable and aerodynamically efficient.
Refining the Setup — A Systematic Approach
Once a solid baseline has been established, refinement should follow a structured process. Using the setup principles covered in this guide, make adjustments based on corner phase and balance. Begin by tailoring the car to your comfort and general balance using alignment settings and anti-roll bars. These changes allow for relatively quick improvements in responsiveness and stability without significantly altering the structure of the setup.
From there, focus on optimizing tire performance. Adjust camber and tire pressures to ensure that the contact patch is being used effectively in the corners. Tire temperatures should be evaluated at the point of maximum load, typically at corner exit rather than on the straights, as this is where performance matters most.
This process may require several iterations, as changes in one area can influence others. Expect to move back and forth between adjustments, gradually refining the setup until the car feels stable, predictable, and competitive. At this stage, the car should be running consistent laps at a strong pace. The next step is extracting the final increments of performance.
Corner-Specific Focus — Entry and Exit
For a corner-focused approach, attention should first be directed toward the exit of Turns 2 and 4. These corners lead onto the longest straights, making exit performance critical. The car must be able to maintain full throttle from the apex through the exit without drifting toward the outside wall. For cars that do not require braking in the corners, traditional front-to-rear weight transfer is limited. This reduces the effectiveness of dampers in their conventional role. In these cases, adjustments to differential power settings, caster, and toe become more influential in shaping exit behavior.
Once exit performance is optimized, attention should shift to entry in Turns 1 and 3. These corners require the car to remain stable and responsive at very high speeds. Differential coast settings, along with caster and toe adjustments, can be used to improve turn-in without compromising stability. As these refinements are made, tire temperatures should be monitored continuously. Changes that improve balance may alter how the tires are loaded, requiring further adjustments to maintain optimal performance. This iterative process continues until the car is both fast and consistent.
At this point, it is worth trying to reduce aerodynamic drag further. Running less wing and lower ride height reopens the refinement loop, but from a faster baseline. This is where the final increments of performance live.
Advanced Tuning — Lateral Damping
Although dampers are less influential in situations with minimal braking, they can still be used effectively through lateral damping. Instead of focusing on front-to-rear weight transfer, lateral damping controls how quickly weight moves from one side of the car to the other during cornering.
For example, if the car exhibits understeer on entry, allowing the rear weight to transition more quickly can help the car rotate. This can be achieved by reducing compression damping on the outside rear or increasing rebound damping on the inside rear. Similar adjustments can be made at the front of the car to control how quickly weight transfers across the front axle.
These changes are subtle, but they show up at the moments that matter most. The car tends to feel more planted and more willing to rotate on entry, without requiring any significant structural changes to the setup.
Gearing and Driving Strategy
Gearing plays an important role at Indianapolis and is often overlooked. In addition to optimizing top speed for the straights, gears can be tuned to improve performance through the corners. As the car slows slightly in the turns, a well-timed downshift can bring the engine back into its optimal power band, improving acceleration on exit. This allows the final gear to be optimized for drafting and passing, rather than being constrained by corner performance.
Driving line also plays a role in overall speed. A later turn-in for Turns 2 and 4 creates a later apex, effectively extending the following straight. This increases the amount of time spent accelerating and reduces steering input at critical moments, minimizing drag and maximizing speed.
Something New is Coming — onRails
If you found this guide useful, you’ll want to know about our next-generation setup app: onRails — Setup Creation and Engineering Suite. It combines and replaces both the Setup Developer Tool and Virtual Race Car Engineer into a single redesigned app that runs as a transparent overlay on top of your sim. Includes a live SimReader for six supported simulators and a brand-new In-Race Engineer for real-time pit-call advice.
Launching July 2026 on Steam.
Final Details — Execution Matters
Even with a strong setup, execution remains critical. Pit stops, for example, can have a measurable impact on race position. Knowing the exact braking point for pit entry, both at speed and under caution, can provide an advantage over drivers who have not practiced this aspect of the race. Small details such as these often separate competitive setups from winning ones.
At Indianapolis, performance comes from maximizing speed through the corners to enable the lowest possible aerodynamic drag. Focus on exit performance onto long straights, maintain stability at high-speed entry, and refine the car iteratively using tire feedback and balance adjustments. Treat the track as four unique corners rather than one continuous oval, and optimize the setup for how each one is actually driven.
You can find more setup guides here
Discover more from Virtual Race Car Engineer
Subscribe to get the latest posts sent to your email.